
May is upon us and with it Spring is coming. We’ve got some mighty travel plans in May, I’ve got a short readathon, and with the weather changing we are planning a couple of outdoor adventures. Since the month is turning out to be a busy one, and since my planning style has ever so slightly changed, I figured I would do a little Plan With Me.
I’ve talked about my own personal planning style before which is using a physical planner. I prefer to be able to write things out and see them in a physical format in front of me, rather than using an electronic calendar or notebook.
I always find it fun to see how others plan out their time, be it monthly or daily, and I find it gives me new ideas to apply to my own planning. The last time I did a planning post, I was using the Day Designer planner that had a monthly and daily layout. I still really like the Day Designer as a system, but I wanted something a little more “freestyle” for my planning. Somewhere that I could just write notes throughout the day without lines and such.
I did a little searching and found the Hobonichi planners. This is a Japanese company and they offer many different styles. The style that I used is the Hobonichi cousin and I have two notebooks, one for January to June and the second from July to December. I like that this planning system is similar to bullet journaling, but I don’t have to fill out any monthly/weekly/daily options.
So, on to my current planning set up…
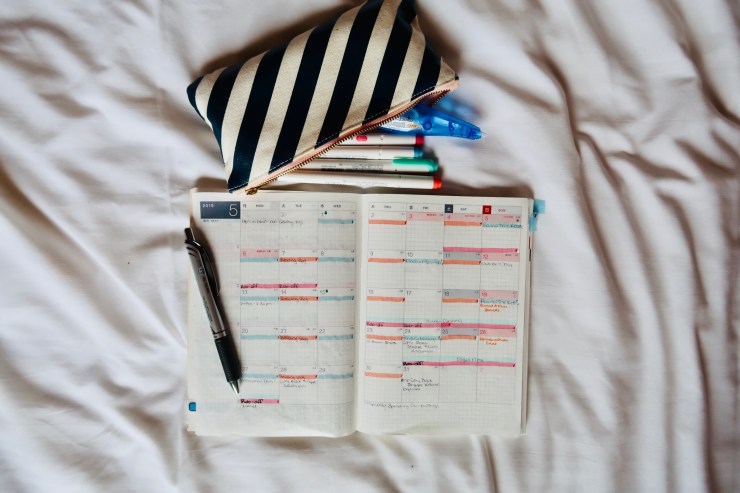
Here’s the monthly view:

Within the month I use colored highlighters (Mildliner) to highlight my posting schedule. I use Blue for A Cuppa Cosy and Orange for my other blog, The Cosy Book Shoppe. Then I use various highlighters to indicate when my husband is off of work or will be gone, or if we are planning an adventure. I like the highlighter look as it gives it a bit of a “cleaner” look to my monthly layout. As someone who wants to quickly look at a month and see what is going on on a specific day within seconds, the highlighters have been a lifesaver. Within the highlighted line I will write in black pen (Pentel EnerGel Needle Tip – .3) what specifically the post, or the trip, or the notation is. Below that I’ll write any appts, important dates, or things to note. I use the sidebar to track my reading through the month, and the bottom sections to track travel and spending.
This planner does come with a weekly outlook, which I like to use for meal planning and as a good breakdown for our week. I mark out my days and times and track my walking and daily reading. This gives me a good chance to look at my week, see where my time is going, and fit in any adventures we want to take during the week. I continue my color coordination in my weekly layout as well using the Pigma Micron Pens.

Then we get to the day layout. This is a day on one page and has a spot for a time breakdown, a small to do list, and a large area to write on. I do a time breakdown, a water/tea tracker, I extend the to do list a couple more boxes, and use the free space to mind map/brain dump throughout my day. I’ve included a glimpse at some of the past days that give a pretty good look at these spaces. Some days are filled up, others are still pretty empty. I don’t always need to use the daily page and some days I’ll use it as a memory device to remind myself of what we did for a later journal entry or blog post (this is very typical when we travel long weekends).
So, that is my planning set up currently! I’ve been really enjoying the Hobonichi and I think it is what I’ll continue on with for the rest of this year and maybe even next year. Do you use a paper planner? How do you plan?
